

Are you ready to upgrade your device to the latest Windows version? Creating a Windows 12 installation media might seem hard. But don’t worry! This quick guide will help you through it, making your transition to the newest Windows smooth.
We’ll cover the key steps to make a bootable USB or DVD for Windows 12. You’ll learn about the purpose of installation media, preparing your device, and what to do after installation. So, let’s start and explore Windows 12 together!
Key Takeaways
- Learn how to create a Windows 12 installation media quickly and efficiently.
- Discover the minimum system requirements and backup your data before the installation process.
- Explore the post-installation steps to ensure a smooth transition to the new operating system.
- Understand the importance of choosing the right file system and partition settings for your installation media.
- Gain insights into the advanced techniques, such as splitting large image files and automating the installation process.
What Is Windows 12 Installation Media?
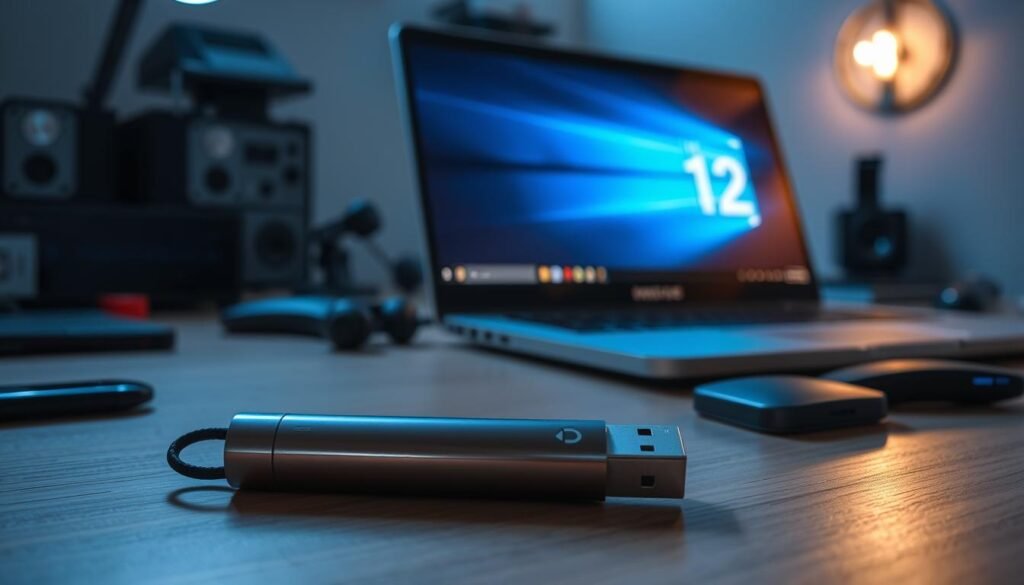
Windows 12 installation media is a USB drive or DVD. It has all the files needed to install Windows 12 on a computer. It lets users install the OS from scratch or update an existing system. Knowing about installation media is key for a smooth Windows 12 setup.
Understanding Installation Media
The Windows 12 installation media is a way to start the OS. It’s a reliable method to set up devices. It can install Windows 12 from scratch or update an existing system, making the transition smooth.
Making a Windows 12 installation media is easy. You just need to download the files and put them on a USB drive or DVD. Then, you can use it to start the installation. It guides you through setting up your device with Windows 12.
Having the Windows 12 installation media is vital. It’s useful for building new computers, upgrading old ones, or fixing problems. Knowing how to use it ensures a smooth Windows 12 installation.
| Key Attributes of Windows 12 Installation Media | Description |
|---|---|
| Bootable Functionality | The installation media is designed to be bootable, allowing users to start their devices and initiate the Windows 12 installation process directly from the USB drive or DVD. |
| Clean Installation | The installation media can be used to perform a clean installation of Windows 12, erasing the existing operating system and starting fresh. |
| Upgrade Capability | The installation media can also be used to upgrade an existing Windows system to the latest version of the operating system. |
| Troubleshooting Tool | In case of system issues or malfunctions, the installation media can be used as a troubleshooting tool to diagnose and resolve problems. |
How to create Installation Media for Windows 12
Creating a bootable installation media is key for setting up Windows 12. It’s important whether you’re starting fresh or upgrading. We’ll show you how to make your Windows 12 installation media. This will help you get your system running smoothly.
Gather the Necessary Resources
Before starting, you’ll need a few things:
- A blank USB drive or DVD with at least 8GB of space
- The Windows 12 installation file (ISO format)
- A device that can make the installation media
Create the Installation Media
Here’s how to create your Windows 12 installation media:
- Put the blank USB drive or DVD into your computer.
- Download the Windows 12 installation file (ISO format) from Microsoft’s website.
- Use tools like Rufus or the Windows Media Creation Tool to make the media.
- Choose the right options, like the file source and drive type (GPT or MBR), for your system.
- Wait for 10-15 minutes for the process to finish.
After making the installation media, you can install Windows 12 on your device. Make sure your system meets the requirements and back up your data before installing.
| Statistic | Value |
|---|---|
| Spice ups for initial post inquiring about creating a Windows 11 Installer USB GPT | 8 |
| Spice ups for comment providing a web link and steps for creating Windows 11 Installation Media | 2 |
| Spice ups for recommendation to use Rufus for creating a bootable USB with a GPT partition scheme for Windows 11 | 2 |
| Spice ups for follow-up comment that solved the problem of creating a Windows installer with a GPT partition table | 1 |
| Spice ups for response indicating that the regular Windows installer can create GPT as well as MBR, and that Windows installation media will detect UEFI and install with GPT if detected | 2 |
| Spice ups for comment questioning the behavior of another user in the thread | 2 |
| Spice ups for follow-up comment thanking another user for helpful information | 1 |
The statistics show the community’s interest in creating Windows 11 installation media. They help us tailor the Windows 12 installation media guide to meet user needs.
Preparing Your Device for Windows 12 Installation
Before starting the Windows 12 installation, make sure your device is ready. You need to check if it meets the system requirements and back up your data.
System Requirements for Windows 12
Your device must meet certain requirements to run Windows 12 well:
- Processor: 2 GHz or faster dual-core processor
- RAM: 4 GB or more
- Storage: 64 GB or larger hard drive
- Graphics: DirectX 9 or later with WDDM 1.0 driver
- Display: 800 x 600 resolution or higher
These are the minimum needs. Your device might work better with more advanced hardware. Check your device’s specs to see if it meets or beats these system requirements for Windows 12.
Backup Your Data
Before you start the Windows 12 installation, back up your important files. This includes documents, photos, videos, and any other files you don’t want to lose.
You can use cloud storage, external hard drives, or USB flash drives to back up your data. Taking the time to backup data before Windows 12 installation will help you feel secure and protect your files.
By preparing your device for Windows 12 installation, you’re setting yourself up for a smooth upgrade.
Post-Installation Steps
After installing Windows 12, there are key steps to take. These actions will make sure your system is ready and running smoothly. They help you enjoy your new Windows 12 to the fullest.
Check for Software Updates
First, check for software updates. These updates include security patches and bug fixes. They make your system more stable and secure. Keeping your software up-to-date is very important.
Configure System Settings
Customize your Windows 12 settings to fit your needs. Adjust display settings and user accounts. Also, set up your favorite tools and apps. This makes your system more comfortable and efficient.
Install Additional Drivers and Applications
You might need extra drivers or apps for your system. This includes drivers for peripherals and productivity software. Make sure to install these to fully optimize your Windows 12.
| Action | Benefit |
|---|---|
| Check for software updates | Ensures your system is secure and up-to-date |
| Configure system settings | Personalizes your Windows 12 experience |
| Install additional drivers and applications | Optimizes your system for specific hardware and software requirements |
By following these steps, you’ll make sure your Windows 12 is fully optimized. Take the time to do these tasks. You’ll then be ready to enjoy all the benefits of your new operating system.
Conclusion
This guide has shown you how to make Windows 12 installation media. It covers why you need it, how to make it, and how to get your device ready. You’ll be ready to start with Windows 12, whether you’re installing it fresh or upgrading.
We talked about why installation media is key, how to make it, and what to do before you start. We covered everything from system needs to backing up your data. Each step is important for a smooth Windows 12 install. The last steps will help you finish setting up and start using Windows 12.
Creating Windows 12 installation media is a useful skill today. By following this guide, you can improve your computer experience. With the right steps and care, you’ll have a successful Windows 12 install. You’ll then be ready to enjoy all the new features and capabilities Windows 12 offers.
FAQ
What is the purpose of Windows 12 installation media?
Windows 12 installation media is a USB drive or DVD. It has the files needed to install Windows 12 on a computer. It lets users install the OS from scratch or upgrade their current system.
What tools and resources are required to create Windows 12 installation media?
You need a blank USB drive or DVD to make Windows 12 installation media. You also need to format the media and copy the installation files.
What are the system requirements for running Windows 12?
Before installing Windows 12, check if your device meets the system requirements. This includes hardware and software specs to run the OS well.
Why is it important to back up data before installing Windows 12?
Backing up your data is key to protect it during the Windows 12 installation. It keeps your important files safe.
What post-installation steps should I take after installing Windows 12?
After installing Windows 12, there are steps to take. Check for updates, set up system settings, and install drivers or apps needed for your setup.
1 thought on “Create Windows 12 Installation Media: Quick Guide”